
- The essentials
- Which film to use & when?
- Where to buy 35mm film?
- Getting your film developed
- Sharing your film captures
The essentials
The biggest learning for me over the first 2 years of this amazing journey, has been the different characteristics of film vs. digital. Different films can have very different looks.
- ISO – Light Sensitivity – 35mm film comes in different levels of light sensitivity – the higher the ISO the higher the sensitivity, just like using your digital camera. However, be warned, you usually sacrifice quality for higher ISO … just like digital 😉
- Grain – different films have different types of grain, in different amounts, and this is a big deal:
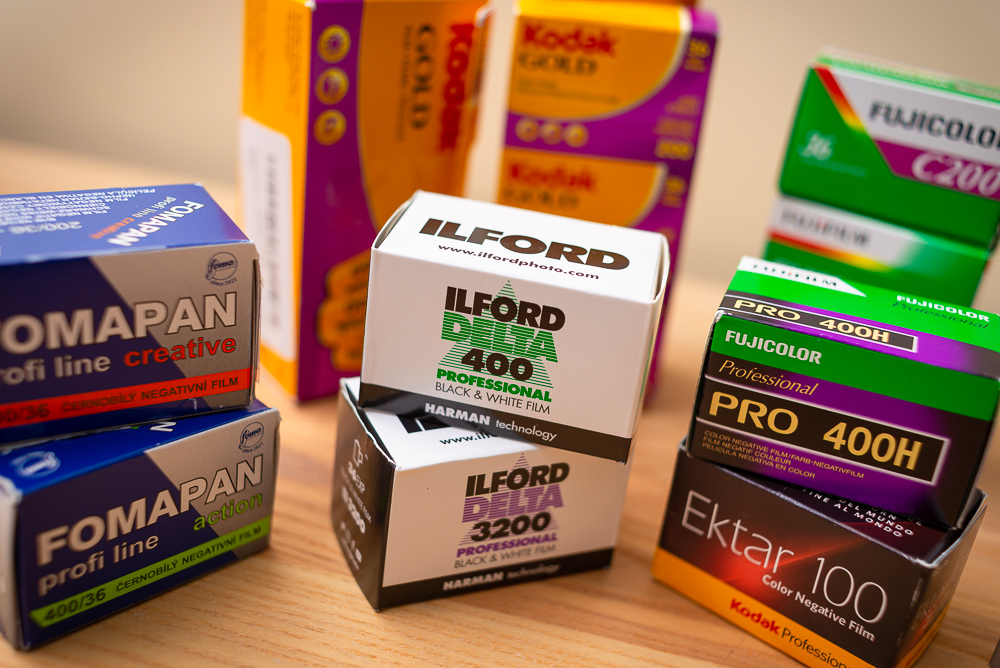
- Most film will use traditional ‘cubic‘ grain. This is grain that’s spread randomly across the negative and can be pleasing to the eye [e.g. Kodak ColorPlus 200, Kodak Gold 200, FujiColor C200, Fomapan B&W 100 & 400, Ilford B&W HP5, etc.) However, I’ve found that it can make your clear blue skies look a little ‘clumpy’ when you use higher ISO or cheaper film
- More ‘advanced’ modern films use ‘tabular‘ grain which often make your images look sharper and attempt to improve resolution at higher ISO’s (e.g. Kodak Ektar 100, FujiFilm Pro 400H, Kodak Portra 400 (I think), Ilford B&W Delta 400 & 3200, etc.). As you’d expect it’s more expensive, and tends to be excellent for scans to digital.
- Contrast & Colour – some films specialize in offering a particular look, Lomography offering wild & exotic colours, Kodak Gold being warm & contrasty, or Portra much more restrained & finer. Then there’s FujiFilm / FujiColor with its emphasis on greens, while there’s obviously B&W with many variations of contrast vs flat.
Here’s an interesting example of how a film negative scan at 3000px wide compares to a rival 6000px digital image which has been downsized to 3000px. Film at this resolution is surprisingly comparable – which means you’re effectively using an 8-10mp camera, and you’ll have no problems getting 12 inch prints without loss of quality 😮👍


Which film to use & when?
I’ve had to experiment a lot, and over the last year I’ve landed on this ready-reckoner which works for me and my style of photography (of course we’re all individual, and your preferences could be different 😇):
| Indoors & Typical cloudy overcast outdoors weather 🏠🌧 | Kodak Ultramax 400 / Fuji Superia 400 (Colour) This film uses modern tabular grain (or appears to at least) which is sharper & crisp, while it’s colour palette is very well suited to the cooler colour environment, and being ISO 400 you’ve that added flexibility when you have to use f5.6 – f8 Ilford HP5 400 (B&W) This film offers the best blend of high ISO and great image quality, especially if you’re getting your negatives scanned and sharing them on social media afterwards |
| Bright Spring & summer outdoors weather 🏖🌤 | Kodak Gold 200 / Kodak ImagePro 100 or FujiColor C200 (Colour) Any of these 3 films will work perfectly on brighter outdoors occasions, and the image quality is perfect for ad-hoc to slightly important shots, without breaking the bank Rollei Superpan 200 / Fomapan 200 Creative (B&W) These are two great B&W films that offer different characteristics, yet both perfect for bright Irish days. I find the Rollei is amazing for detailed landscapes & textures, while the Fomapan is perfect for old-school style images. |
| Important Landscape shots 🏔🌅 | Kodak Ektar 100 / Kodak Portra 160 (Colour) Kodak Ektar 35mm film is simply amazing in the amount of crisp details it’s capable of capturing ! Meanwhile, Kodak Portra 160 is slightly more flexible, has fantastic details too, lovely tonality, and more gentle levels of saturation (all of which I personally prefer) Important Notes 1. Ektar negative scans may have very high amounts of saturation and very deep blacks, which may require considerable tweaking before you share online … 2. Conversely Portra 160 it will more than likely require a boost in contrast & saturation. I find it easier to add, than take away, hence my preference for Portra. 3. Personally speaking, I genuinely don’t take “important” landscape photos in B&W film. For me, it’s not worth the time & effort to walk away with an image that, at the end of the day, is an interpretation of I saw through the viewfinder (think of blazing sunsets, sunrises, field of flowers, etc.) |
| Important Portrait Shots (+ Flash) 👰♂️📸 | Kodak Portra 400 / Kodak ProImage 100 / Kodak Ultramax 400 (Colour) I can understand why Kodak Portra 400 is so popular – the grain & colour tonality is genuinely stunning. However Portra is soooo expensive relatively speaking 😮💶 So I will go on record and say that Kodak ProImage 100 & Kodak Ultramax 400 also have nice-great skin tones too, without having to pay double the price for Portra. Ilford Delta 400 / Fomapan 200 Creative (B&W) These two films, while offering similar characteristics will give you a great starting point for wonderful B&W portraits in my opinion. It goes without saying the Delta 400 is more expensive but you get awesome grain quality in return. |
| Night Photography 🌆🌛 | Lomography Color 800 / Kodak Ultramax 400 (Colour) These are great colour films for night photography and they handle the mixed colour of streetlights very well, and are reasonably forgiving on the grain front for what you’re trying to accomplish. Ilford Delta 400 / Ilford Delta 3200 (B&W) These films, especially the Delta 3200 are simply amazing for dark, low-light conditions at night. The grain quality is excellent, highly recommended |
Where to buy 35mm film?
I always try to buy local here in Ireland, so even before you attempt to visit eBay / Amazon or mainland Europe websites, please please support Irish photography & printing businesses:
- www.thephotoshop.ie (friendly & efficient online shop based in Trim Co. Meath, selling 35mm & 120 film and developing chemicals)
- www.printpoint.ie (an amazing do-it-all lab, offering both film stock and development -> high-res film scanning & printing lab based in Limerick)
- www.johngunn.ie (long-running family store based in Dublin offering film stock, development & scanning)
- www.davittphoto.ie (long running store based in Galway offering a wide array of film stock options for all formats)
- www.connscameras.ie (long running photography store based in Dublin)
I do have to say that the price of film stock has risen noticeably over the last 2-3 years, anywhere between 25-50%. From what I’ve read online and in social media, it looks like 2024 might see Kodak introducing price hikes agan 😫
So that leaves me to reiterate and expand upon my first paragraph above:
- Please support Irish film photography & printing businesses – it’s peoples livelihoods we’re collectively supporting behind your interest & enjoyment of film photography 👨👩👧👦🏘
- If you think about it from an overall supply-chain perspective: by continuing to buy local, you’re helping to ensure Irish businesses remain on the European distribution pecking order 🌐⚖️
- Use some common-sense to ensure you’re getting a fair price for your film stock (e.g. you should never ever have to pay more than
€8€10€12 for a roll of humble Kodak Gold 36 exp, unless it’s an emergency 🤪🔥)
Getting your film developed
This is the topic folks seem to struggle with – and there’s 4 choices:
- Develop the film / negatives yourself
- Get them developed and printed in a lab
- Get them developed by a lab, but scan them yourself (e.g. take a digital photograph of your negative frames using a macro lens & light-box set-up)
- Get them developed and scanned by a lab (i.e. links to the jpegs / tiff files sent to you in an email)
I have had no experience with developing the film myself, and can’t vouch for this approach. Although from the folks I follow on instagram, I can see this is very much alive and well, apparently with a lot of enjoyment & fulfilment to be gained, by seeing your negative go through the entire process end-to-end by your own hands.
However the other three approaches I can offer some advice & opinions:
- I strongly advise that you get your negatives developed and scanned by a lab initially (some listed above). That accelerates the learning process and makes life a lot easier for you as you find your feet
- I highly recommend that you ensure that your scans have a frame’s longest side greater than 2000px, otherwise you’re losing a lot of detail from your images.
- All mine the last year have been 3000px long, and it’s made a tremendous difference in terms of printing and even post-editing my favourite images in Lightroom.
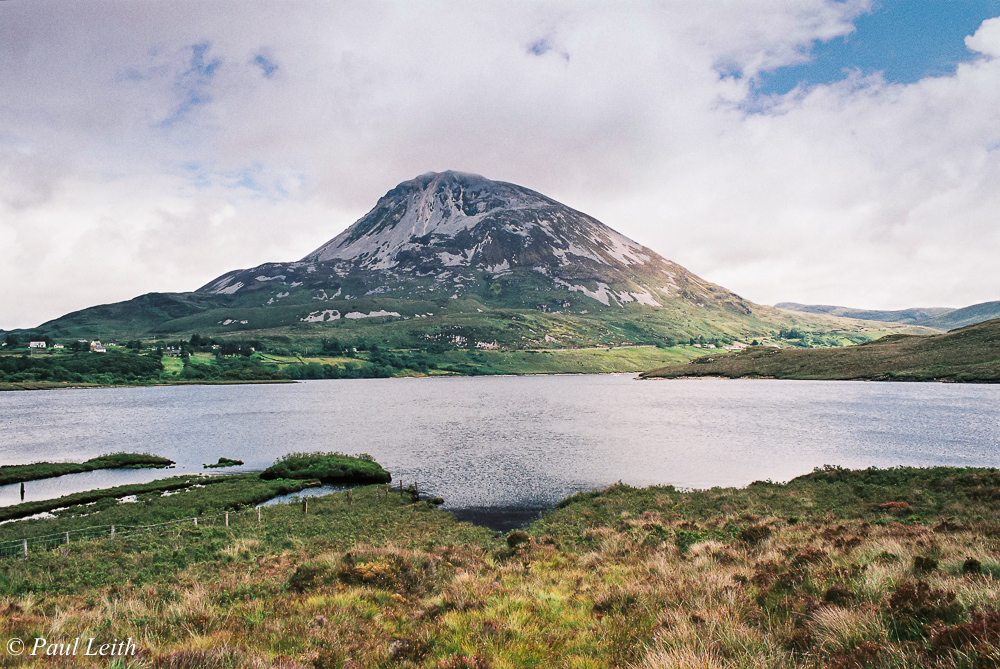
- Please do get your favourite 35mm photos printed, I have an A4 print of Mount Errigal over my WFH desk here, and I’m always amazed at how this humble film image has such great detail in it.
A lot of the businesses I mentioned above which sell film, often tend to develop 35mm film too and offer ranges of digital scans too, so please check out those links.
Sharing your film captures
The great joy with getting scans of your negatives is sharing them afterwards with family, friends, and online communities. So a few helpful notes:
- Your film scans will more than likely require some tweaking, as the scanner operator is not YOU … you have your own look:
- Maybe the B&W film isn’t contrasty enough, or the film is way too warm for your liking and you need to reign it in just a tad, or there’s a lot of artefacts that need to be cloned out (dust, etc.).
- I’ve found in majority of cases, the sky always seems to be somewhat ill-defined, yet my negatives have a lots of detail there !
- Please join a community and share your images on social media, in particular instagram has some wonderful communities (e.g. @irelandanalog or @analogshootersireland) with hashtags like: #grainisgood, #filmisnotdead, #buyfilmnotmegapixels, etc. giving you a great starting place to explore more
Don’t forget to tell people about your experiences: what it’s like to shoot with film, and how you feel about the experience and what it means to you !
I guarantee you that will you get strange looks, the first time you have to change a roll of film in your camera in the street … enjoy!
Paul
💻 Instagram: @irishanalogadventures
