
This is one blog post I’ve been really looking forward to writing and sharing … !
On my 35mm film journey, it became obvious that even though film has the ability to capture surprising levels of detail and cover an impressive dynamic range, the ‘final product’ was often in the hands of the operator behind the printing and / or scanning equipment, especially in these 3 situations:
- High contrast scenes – landscapes with deep darks and detailed skies, all of which have to be retained
- Dark scenes – evening / blue hour scenes, where film has to keep those dark elements
- Mixed lighting – jumping between tungsten & sunlight in the same roll of film
Something had to change … I had to try take back control, but setting up a darkroom wasn’t on the cards : enter the digital editing suite, Adobe Lightroom 😯
However, let me share a few use cases, which will help explain more about why I had to bring in this digital tool into my film photography workflow.
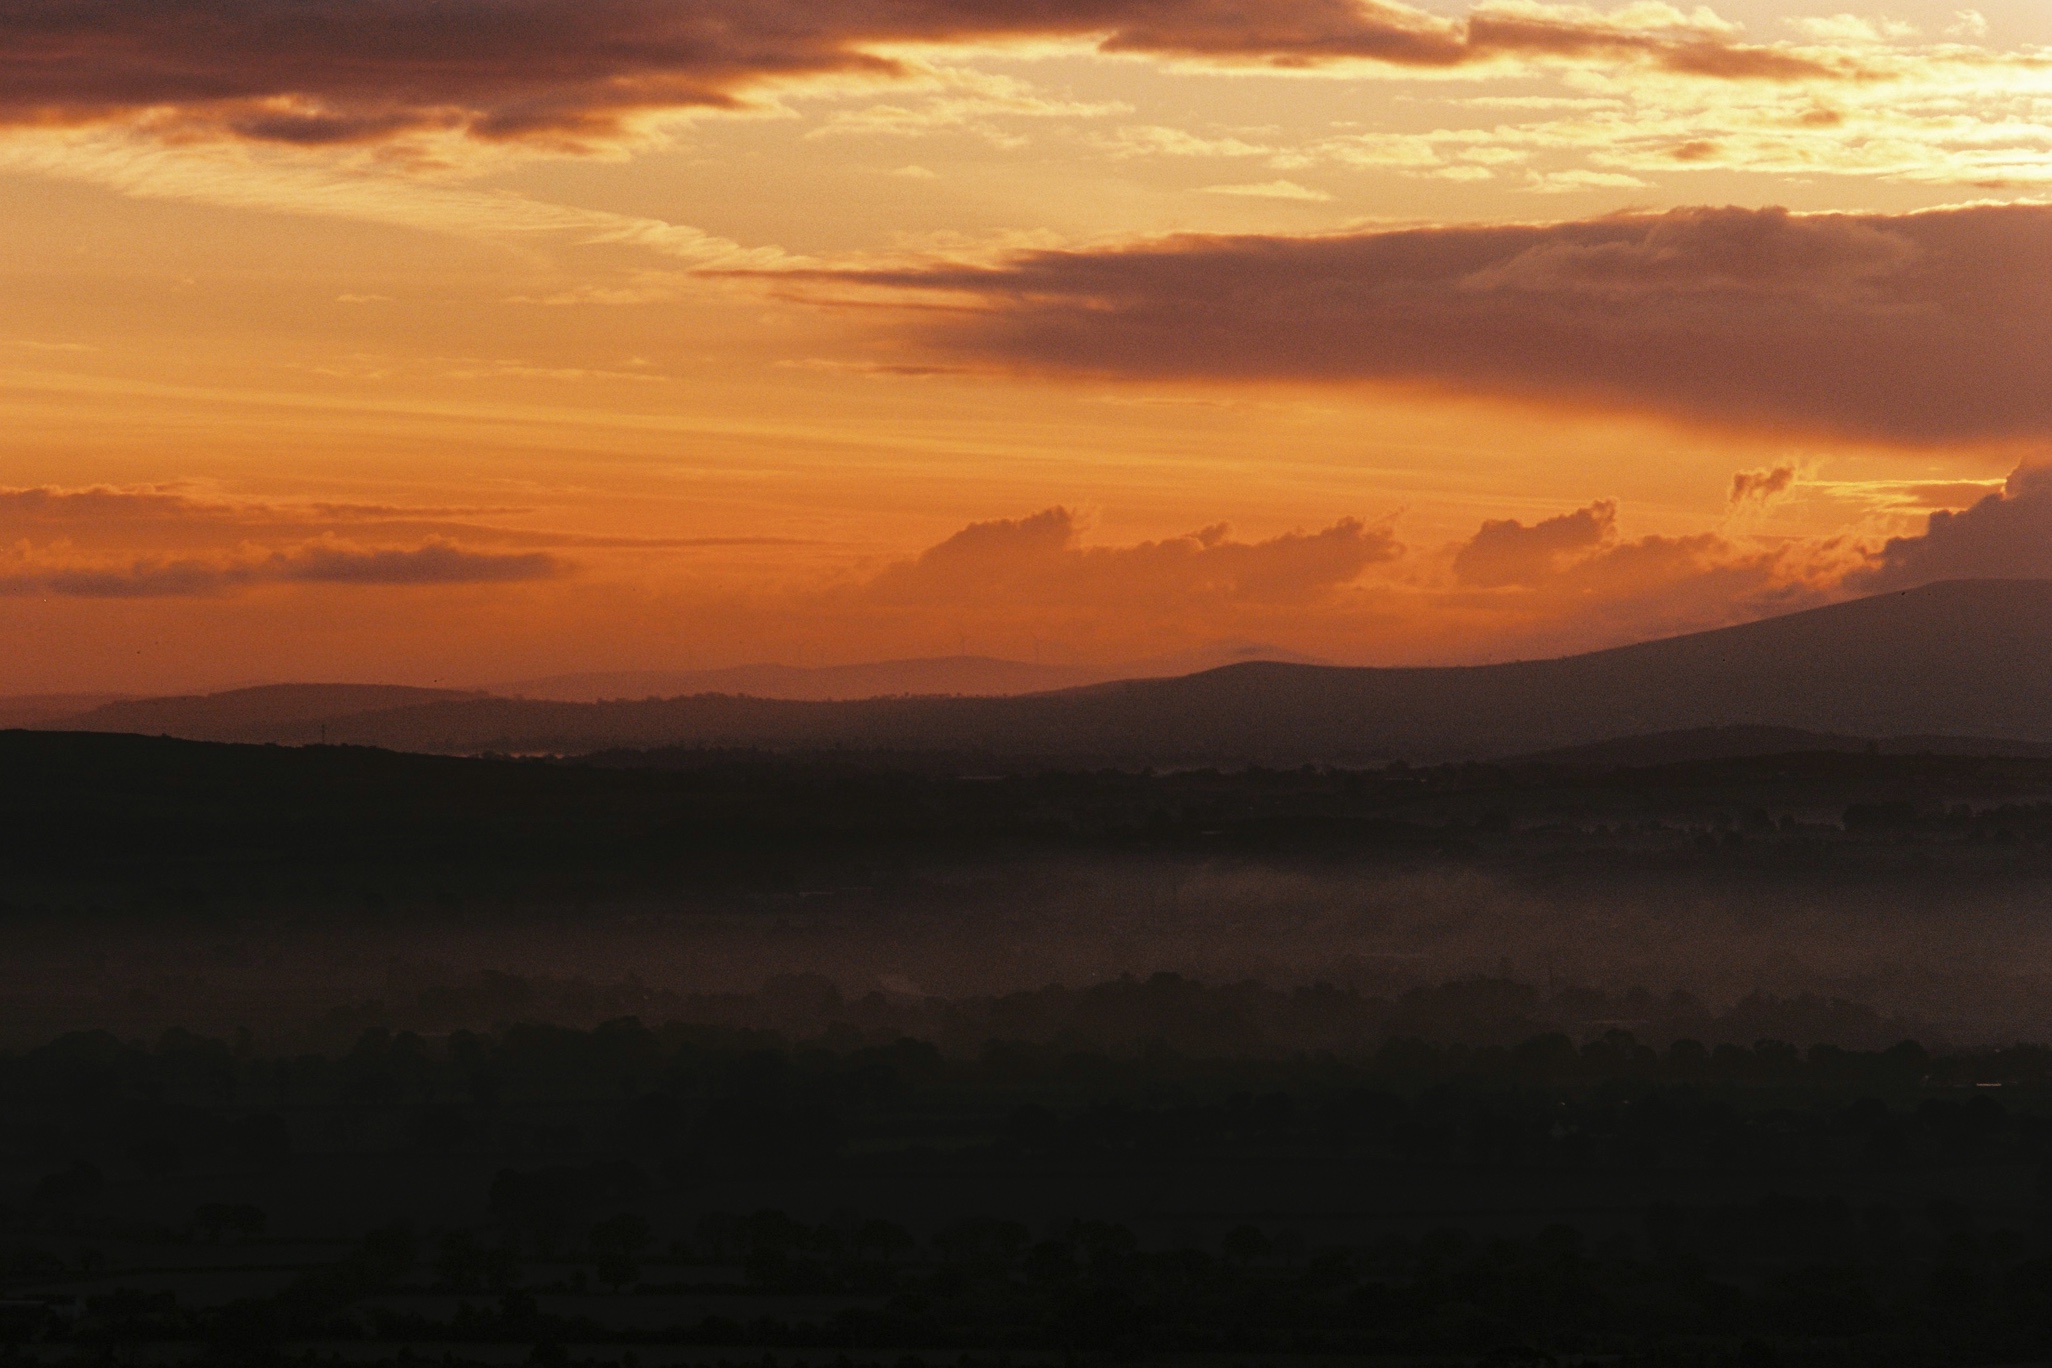
Example #1
On this beautiful autumn morning, I could clearly see through the viewfinder of my Nikon FE2 a hazy, a deep sunrise creeping slowly over the misty fields below. Even though my 35mm negative scan did an amazing job at pulling out the details from the film, it was still lacking the overall image balance, with crucial elements being ‘lost’ in the shadows.
The original film scan is on the left, while the version with a little bit of Lightroom editing fairy-dust is on the right:

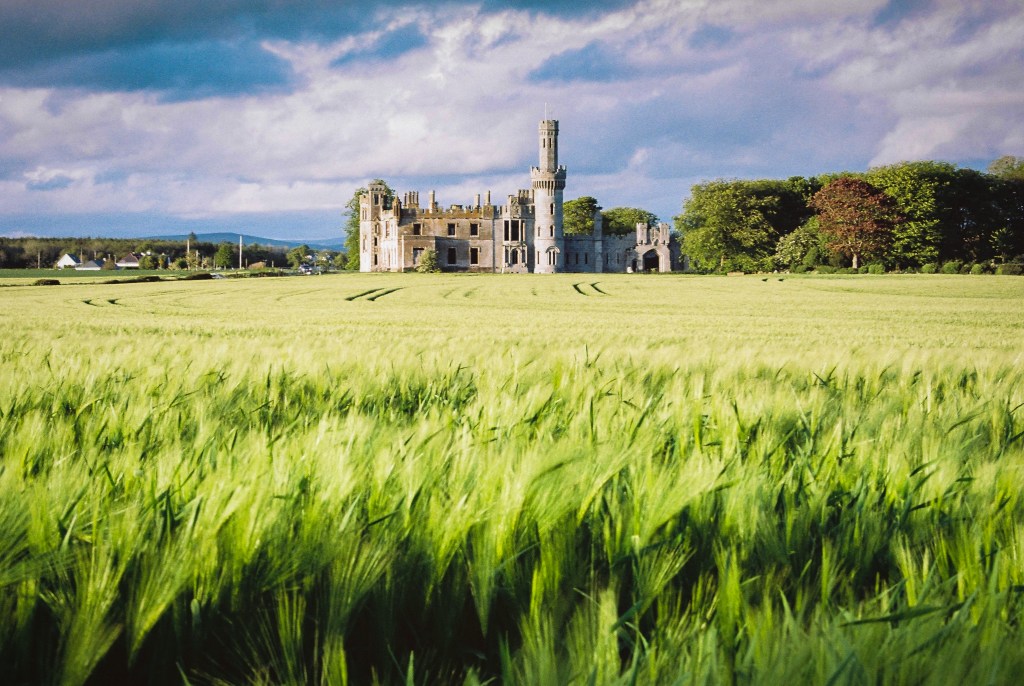
Example #2
This unforgettable spring scene saw strong sunlight from the left hitting the beautiful architecture, and the bold green wheat, coupled with dark moody cloud elements overhead.
The original scan (left) seemed to be overly yellow, missing the cloud elements I could clearly see with my eyes, and the green wheat lacked contrast … a few Lightroom tweaks later (right) brought my film scan closer to what I saw with my eyes:


Game Rules …
The funny thing is that I embraced analogue photography to escape the clutches of the mindless automation with digital photography, yet there I stood, realizing that in order to unleash the full potential of 35mm film scans, a little bit of digital era spit-n-polish was inescapable !
However, the important thing I have to point out is that there are a few game rules to editing 35mm film scans, as it’s all about balancing authenticity after all:
- Rule #1 – it’s not a digital RAW file so “keep it real” and authentic to the medium of 35mm film ! The grain shouldn’t suddenly disappear, the overall colour tones shouldn’t shift dramatically, the contrast shouldn’t shift radically !
- Rule #2 – use the editing to address highlights & shadows which may not be fully realized in the scans
- Rule #3 – use editing to help resolve strong colour casts and / or white-balance issues that reduce the overall impact of the image
- Rule #4 – use editing to address blemishes & artifacts that take away from the power of the image
- Rule #5 – I repeat, keep it authentic !
Edit Walkthrough
So let me walk you through my film editing process, what it is I change, why I do it, and how I do it.
My hope is that by sharing this information, in an honest & forthright manner, it might encourage you to explore new avenues to maximise the potential of your 35mm film scans, other than the physicality of the medium (film choice, lens choice, lens filters, etc.)
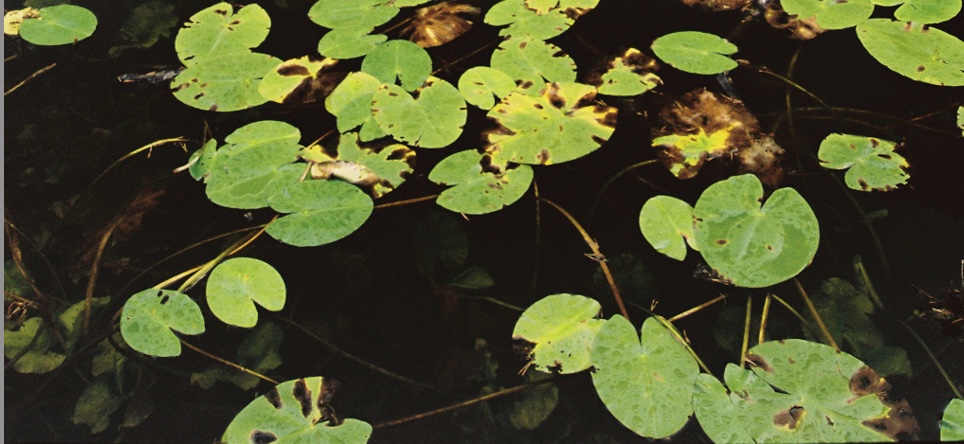
So what changed ?
- The clouds are now visible & present 🌥
- The yellow colour cast from Kodak Portrait 160 has been dialled back somewhat, to reflect the colder bluer-greener morning scene that was actually there 🎛
- The shadows have been opened up & the highlights have been closed in ⚖
- The Lilly pads at the bottom have been brightened up a touch, as they’re the star of the show 📸
Step 1 – Overall Content
The first step is to realise and maximise the overall content by addressing the exposure, contrast, highlights & shadows in one bold step:

What I’ve noticed with my film scans over the last 2 years is that I always have to reduce the ‘contrast’ and reduce the ‘exposure’ first and foremost to start revealing a lot more underlying structure, which in turn makes the changes to the highlights & shadows more effective.
The scans can also look a little flat (which is great initially as it implies the underlying content is being maintained), so a punch into the ‘whites’ and ‘clarity’ help bring this next level of content across the line:

Step 2 – Skies
For me, the skies in my 35mm scans always seem to be the weakest component that needs to be resolved, even when using soft/hard graduated filters. So now that I’ve increased the amount of content in step 1, I begin addressing this deficiency by using the simple application of a gradient mask.

Note how I am being sensitive to the overall feel of the film – I’m intentionally reducing the contrast, as I lower the exposure, while applying the highlight reduction. It’s a delicate balance to reveal the detail without getting all digital about it:

Step 3 – Colour Cast
Certain types of film will have different colour casts – Kodak Portra adds yellow, Kodak Gold adds orange, Fuji C200 adds green, etc. Most film is designed for daylight (approx. 5500k) so it’s natural to expect additional colour shifts when you’re taking images at dawn vs. evening vs. heavy overcast vs. summer blue skies.
What’s crucial here is that overall colour tone ‘look’ shouldn’t be lost, after all that’s what makes the image recognisable as 35mm film … but instead unnecessary shifts in colour are balanced sensibly:

This step is something that’s conducted on a frame-by-frame basis, depending on the photograph.
Summary
Ok, so that was a lot of info … however, I hope this detailed behind-the-scenes walkthrough of what happens with some of my 35mm film scans helps. As I say, it’s not something I do with all my film photos – it’s primarily the 3 situations I mentioned at the beginning.
I absolutely realise this digital workflow step in the realm of analogue photography is NOT for everyone, however in my case, I feel it helps me address the small gaps in what I saw through my optical viewfinder vs. what I received 😇
Until my next post, keep shooting film !
Paul
